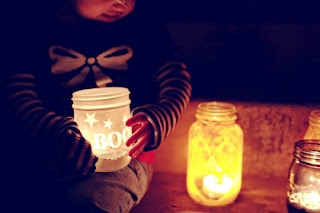
Below is one of my favorite family craft ideas to include in your rituals for a spirited and bonding Halloween.

Supplies needed for this:
· Painters tape
· Newspaper or (wax paper, butchers paper)
· Jars (canning jars)
· Paint (acrylic paint)
· Paint brushes
· Black magic marker or black paint
· Scissors
· Tea light candles, battery operated tea light (or white Christmas lights)
First step is to decide if you want to do all stenciled, drawn or painted on faces, or a combination of the two. Use your black paint and black magic markers to draw faces on the jars. I personally prefer to do a few of both the stencil and marker looks because they have such a different look to them. With the stencil look, the jar is an illuminated by the unpainted clear face outline of the jar and the jars with the drawn on faces looks more like a lantern.
Once you have your materials ready place the protective paper of your choose over your working area for easy cleanup and to avoid any paint mishaps, then let the fun begin. * You can find dozens of free printable stencils online or be creative and draw your own.
To create the Illuminated Face Glow Jars:
1. Place your cut out stencil painter tape pieces onto the jars and start painting.
2. One layer of acrylic craft paint is enough for these because it adds a rustic look, but you can add another if you like. *Glass is picky about being painted and will peel if you don’t allow the first layer to dry completely. Just make sure they don't paint the inside. Keep the lid on or add tape to the opening of the jar to avoid that.
3. Once the jars are dry, peel off your painter tape, and place the jars either outside with a battery operated tea light or candle, for inside use Christmas lights to illuminate the jars.
To create Illuminated Lantern Jars:

1. Paint the entire jar and allow to dry completely. Just make sure they don't paint the inside. Keep the lid on or add tape to the opening of the jar to avoid that.
2. Once dry, draw on your pumpkin face using the magic markers, then paint over with black paint to add more detail.
3. Once the jars are dry, peel off your painter tape, and place the jars either outside with a tea light candle, or inside using Christmas lights to illuminate the jars. *For safety reasons when using tea light candles you should poke some holes in the jar lid and keep the top on to avoid any injuries.
Simple solution for smaller children:
If you are crafting with small children and do not want to get involved with the mess of paint, magic markers, and candles you can still make these jars using tissue paper, creativity, and a little elmer's glue. (NO CANDLES) use the Christmas lights to illuminate your tissue paper jars.
Illuminated Tissue Paper Pumpkin Jars

Not only will these homemade crafts spook and entertain the neighborhood ghouls and boys, they will also increase the bonding and fun time your children associate with the holidays and family, while influencing them to open up their creative minds to bring out their own little special unique touches to these festive decorations you will have for years to come.
No comments:
Post a Comment